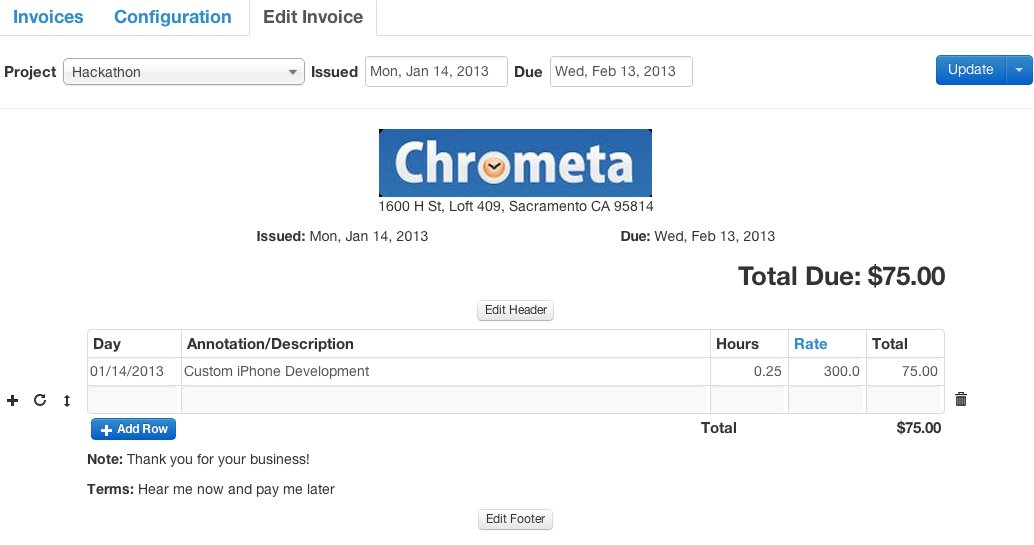
You probably wouldn't mind getting paid by your clients faster after invoicing them for all your hard work. We designed our new Invoicing Tool to bypass the usual payment collection hassle. After capturing all of your billable time automatically, Chrometa can create your entire month's worth of invoices with the click of a mouse. Each invoice looks professional -- with your firm's logo if you choose. And best of all, it's a snap for your clients to pay you directly online.
Customizing Your Invoice Header
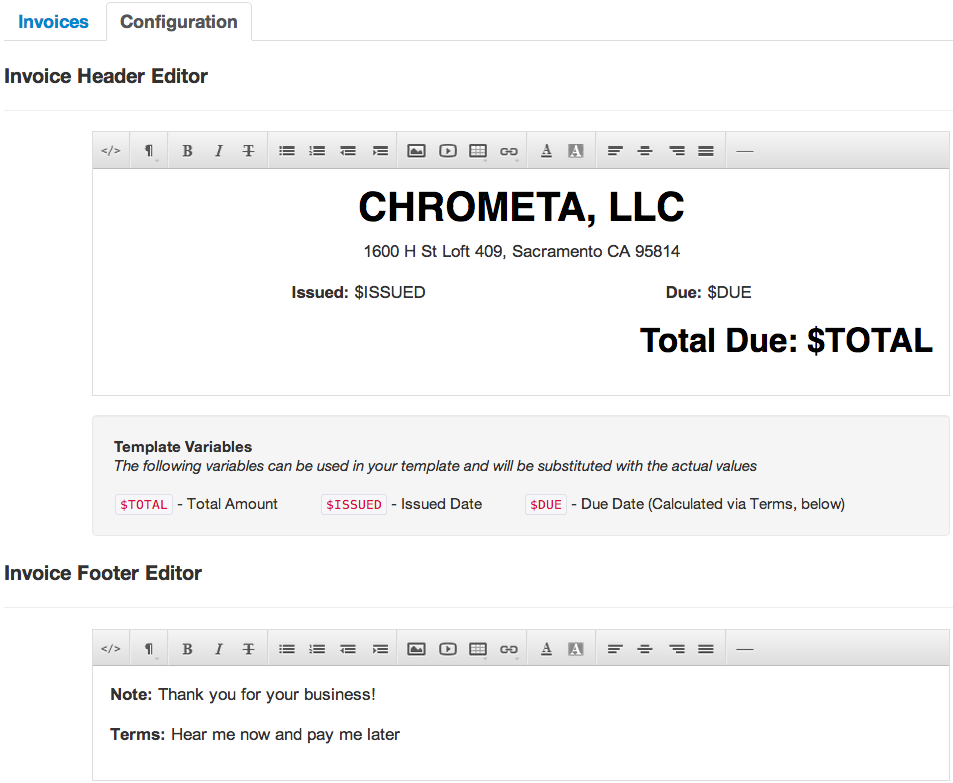
Click the Configuration tab under the Invoices tab to setup a custom header for your invoices. Here, you can add your company logo to your invoice, as well as your company name and address.
The Invoice Header Editor works like your computer's word processor. Use the menu at the top to set styling and add pictures and/or logos.
We have 3 template variables included in the header that will update dynamically with each invoices.
- $TOTAL = Total amount of the invoice
- $ISSUED = Issued date
- $DUE = Due date of the invoice, calculated automatically based on your payment terms (see below)
Customizing Your Invoice Footer
You can also setup a custom footer for your invoices. The Invoice Footer Editor also works like a word processor. Here you can add default notes, payment terms, and other information.
 Customize your invoice header and footers with the Invoice Header & Footer Editor.
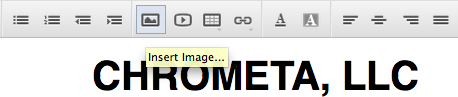
Adding Your Company Logo
Add your logo to your invoice via the Invoice Header Editor by clicking the Insert Image button:
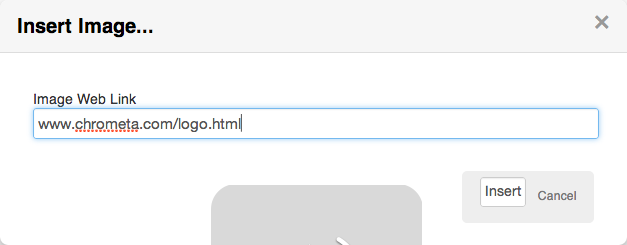
Copy & paste the URL of your logo image into the popup box. (If you don't yet have your company logo uploaded online, it'd be best to do that first).
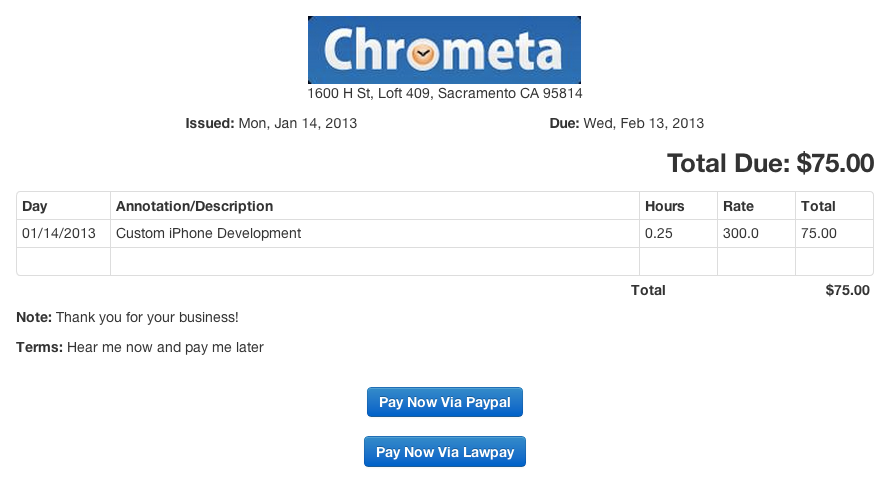
Once your image is added, your logo will appear in your invoice headers going forward:
Default Payment Terms & Tax Column
Set your Default Payment Terms (ie. Net 30 days), and add a Tax Column, by using the Invoice Options, which are located beneath the Invoice Footer Editor.

PayPal / LawPay Setup
You can request electronic payments from your clients via PayPal and/or LawPay.
To enable PayPal, turn the PayPal setting ON, and enter your PayPal email address - the email address you use to log in to PayPal. (If it's the same email address that you use to log in to Chrometa, you can leave this blank - we'll plugin the email address we have on file).
To enable LawPay, turn the LawPay setting ON, and enter your LawPay login and email address. (If your LawPay email address is the same email address that you use to log in to Chrometa, you can leave this blank - we'll plugin the email address we have on file).
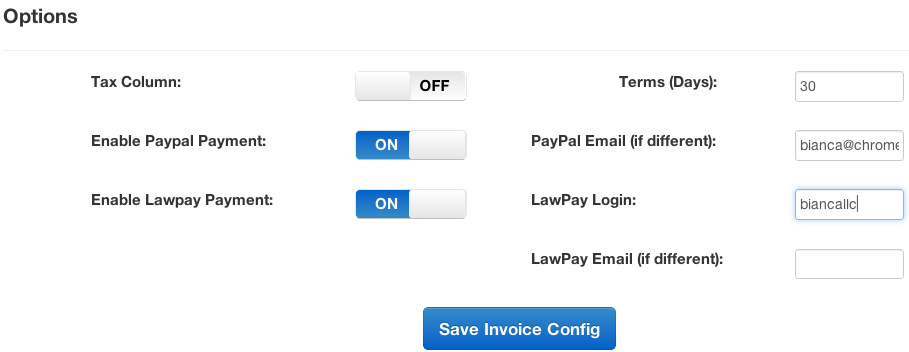
When you enable PayPal and/or LawPay, your clients will see a Pay via PayPal / LawPay link when they receive your invoices via email (see screen shot in previous section).
"One Off" Header/Footer Changes
The configuration described here will apply to your invoices all of the time. You can also make one-off changes to the header and footer of each invoice by using the Header/Footer Editor when creating a new invoice or editing an existing one. When you are working with a specific invoice, your changes will only apply to that particular invoice.
Click the Edit Header or Edit Footer button to make styling modifications to an individual invoice.
Comments
0 comments
Article is closed for comments.